Skip to content

Jeni Chen Posts

My BC Culture Days In-Personal Event Recap

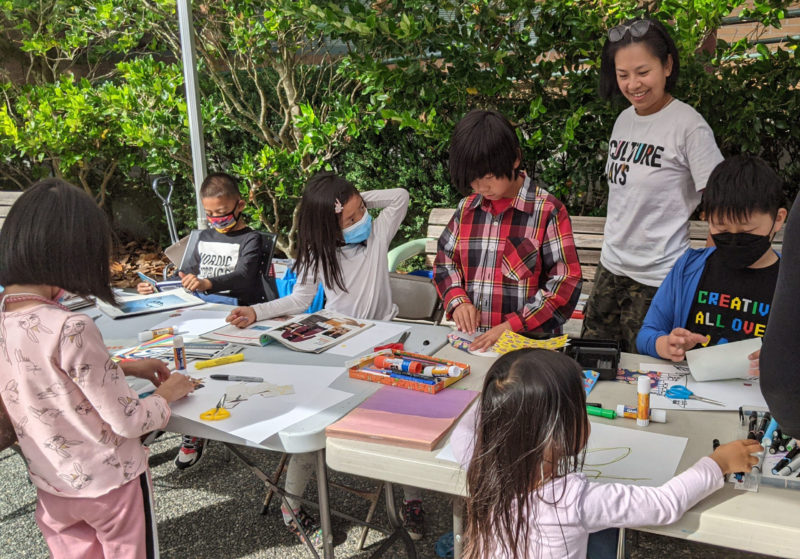
I had so much fun at my BC Culture Days event: Art Journaling for Beginners. It was a sunny day and I had my favorite person in the world (my son EJ) helping me. While setting up, we could hear beautiful live music, performed by the Camilli Quartet. My event was scheduled from 1pm-3pm but we started earlier and ended after 4pm. A boy refused to leave and his mom had to drag him away so the volunteers could put away the tables and chairs.

My original plan was to do a live art journaling demo and people could try out my materials. I brought different kinds of pens: brush pens, alcohol markers, thin & thick Sharpies, thin & thick markers, crayons, water soluble crayons, colour pencils, highlighters. I also brought stickers, washi tapes, origami papers, construction papers in addition to magazines.

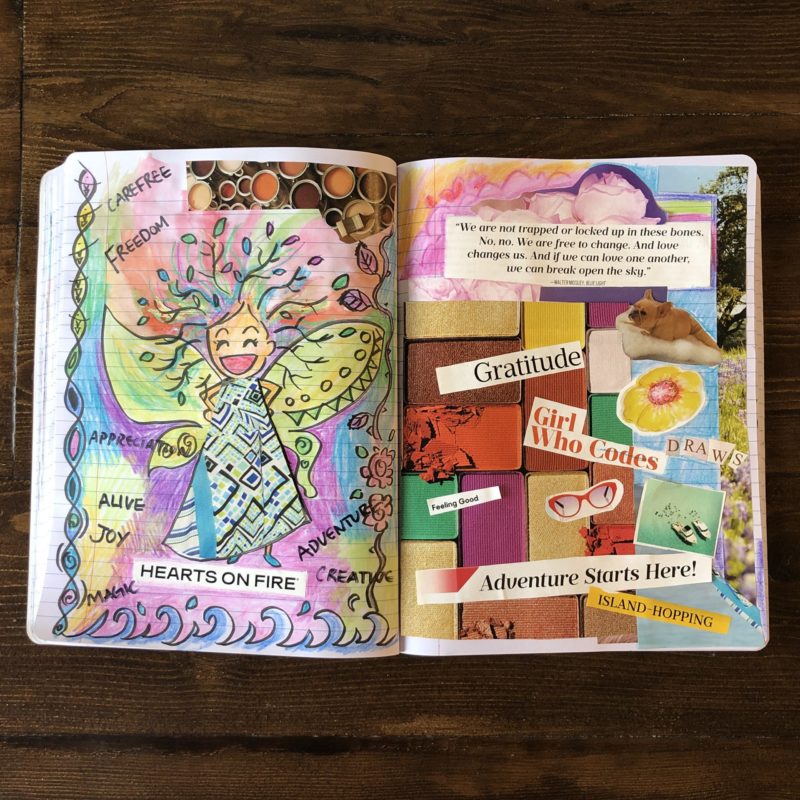
But the kids just kept coming that I only had time to show them the finished art journal page that I did in my step-by-step video. I described quickly that I drew myself as a fairy, cut out pictures and words that I liked from the magazines and encourage them to do whatever they want. I gave them 11”x17” printer papers and they were free to use anything on the table and cut from the magazines. Sometimes the kids would ask again to verify that they could really cut from any magazines.

We had toddlers, teenagers and adults visiting the booth. Soon the volunteers had to bring me another table and more chairs to fit all the materials and kids.

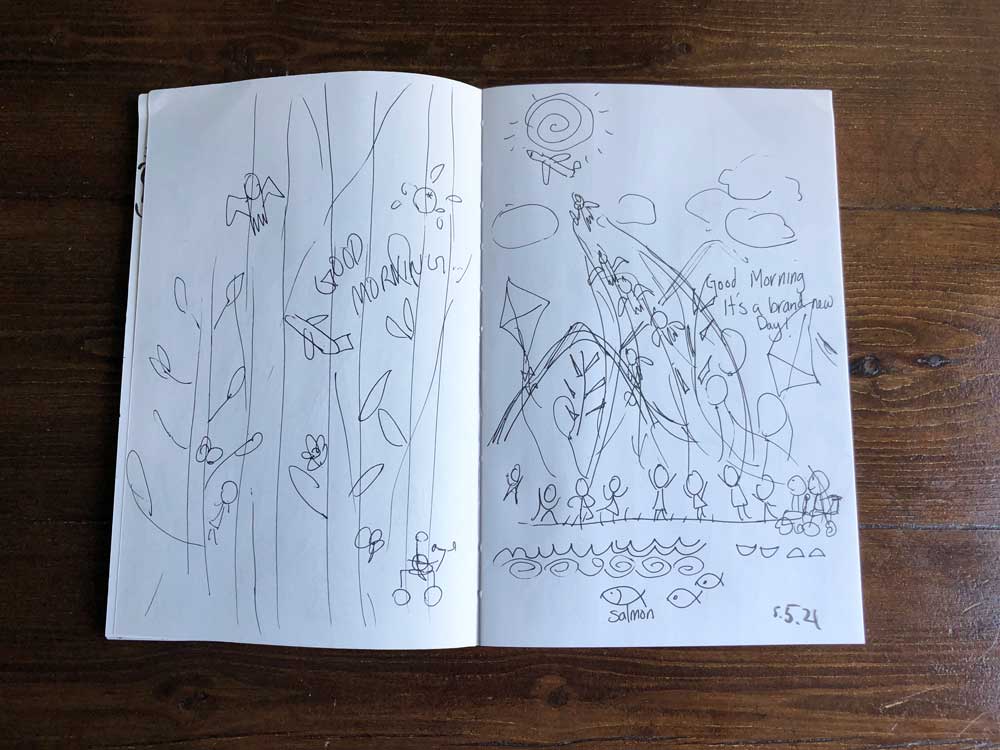
A mom asked me in conversation what’s the purpose of this activity. I told her we were just playing, trying things out with no specific results in mind. Sometimes that’s how we get brand new ideas. Her 3-year old son wanted to draw dinosaurs but didn’t know how. I told his mom that we were not here to show him how “I” draw a dinosaur. After a while, he put several squiggly lines together and totally captured the essence of a dinosaur! His mom was so proud! After some encouragements, he went on to draw a bunch of dinosaurs that he could name, a T-Rex, Pterodactyl, etc.

My art director EJ made an origami frog to entertain the little boy who then made a boat that looked like a flying boat for me. Another little girl started to put dots in different colors all over her paper and I told her that’s a great idea and I am going to do that in my art journal too! After she’s done, she made a medal looking piece of art for me. I was so happy!

I also brought my printmaking and book binding materials in case people got bored and wanted to try different things but we didn’t even have time to get to those. The most popular materials among the kids were the stickers, washi tapes and origami papers. My son started teaching kids and adults how to make origami lotus flowers, frogs, etc. When he was younger, he made several Youtube videos teaching people how to make his made-up origami stuff. So cute.

I was really happy to see how people came up with different art using the same materials. It’s like back in art school, one of the best things was to see how my classmates all interpreted the homework assignment so differently. My art teacher would say, he was not teaching us how “he” would draw but guiding us to express ourselves.

Picasso said: “It took me four years to paint like Raphael, but a lifetime to paint like a child” and “Every child is an artist. The problem is how to remain an artist once he grows up.”

I felt like I was one of the kids during this event. Although I was physically tired afterward, I felt happy.

Leave a Comment

My Picture Book Making Process Recap Part 2 – Character Design

I had my rough manuscript and dummy book. Before I started to draw a comprehensible version of the dummy book, I needed to create my main character. I knew I wanted his name to start with E because my son’s name starts with an E. I googled boy’s names and found Emet which means universal, whole and truth. I liked that and it is fitting with the message of my story.

@MakeArtThatSells posted samples of character designs on Instagram. They offer children’s book illustration classes and participants would draw their character with different expressions. So that’s what I did. Later, I watched a SCBWI digital workshop by Vashti Harrison and she did the same thing.

In addition to drawing different expressions for the character, Vashti drew the whole body of her character at different angles. She also gave the character different accessories to show personality.

I found the explanation of how to draw kids on this blog very helpful: Tips for Drawing Child Characters

I also look at the proportions of the characters in picture book that I like to figure out the proportion of my character.

This was my original character design of my character Emet:

When I started working on my refined dummy book, I kept on drawing a different looking boy for some unknown reason.

After signing the publishing contract, I had about 12 months to finish my illustrations. It was a really good thing for me to have this much time as it is my first picture book and I really needed the time to learn. After I finished the full-colour illustrations after 8 months, my publisher and I talked about the ethnicity of my characters. I decided to darken the hair and skin of Emet and his family to represent people of color. They are immigrants just like me. I changed some of the settings to reflect my culture, what we eat, our habits, etc. When my son looked at my earlier illustrations, he pointed out that Emet shouldn’t wear shoes in the house before I even thought about the ethnicity of Emet. I guess kids do pick up things like that!

So he ended up looking like this. Let me know what you think!

Leave a Comment

Cover Reveal & My Picture Book Making Process Recap Part 1

One year after signing the publishing contract, my picture book is finally done! I’ve submitted the final texts and illustrations. It’s in the hands of my publisher now. It has been a long process and a lot of work but very fulfilling. Check out my COVER REVEAL and interview on my publisher’s blog here.

I am writing a series of recaps for the making of my debut picture book Emet’s Box. This is the first recap.

Previously, I wrote a blog post about when I got my idea for the picture book Emet’s Box here: Inspiration that Woke Me Up. Looking back at my notes now, I realized that I had a general idea several months earlier while taking my first picture book class. It started out as something that I’ve realized from living life and something that I wanted to share with my son who was five at the time. Maybe it’s also a reminder to myself as a mom and as a person who’s still learning the secrets of life.

I wrote in my notebook/sketchbook/journal that:
“I know for sure that you are going to be something so big so awesome so wonderful when you grow up and that I can’t even imagine now. So I leave it to you. To shine + be yourself + always remember who you are inside. Because you are made of LOVE + LIGHT!”

(Wooo, I still get goose bumps reading this after five years…)

That’s the basis of my picture book Emet’s Box. That early morning when the Inspiration that Woke Me Up happened, the idea had already transformed into a picture book format with page numbers written on the pieces of scrap papers of my first draft.

This reminds me of a Ted Talk that I watched: The Surprising Habits of Original Thinkers by Adam Grant. He said there are benefits to procrastinating to a certain degree. Although we haven’t started on the task, our brains have already begun putting the pieces together while we procrastinate. Maybe that’s what happened to me here.

Soon after I wrote the first draft on papers, I made a little dummy book so I could see how the spread looked and how the page turns would affect the story (read more about dummy books here). I also put my story onto a thumbnail page that I got from my picture book class.

Later I made more dummy books and different thumbnail formats that suited the stage of my process. For example, I took pieces of 11” x 17” papers and drew my own thumbnail boxes. I drew and wrote down all my ideas on these papers. I found the large size of blank paper freeing and great for brainstorming.

In January 2019, I put my effort into making my picture book. My goal was to get it critiqued at the SCBWI conference in Seattle so I needed to have my dummy book done by then. This goal made me push myself to finish the task.

The manuscript went through multiple critics and I made several dummy books to show my local SCBWI people.

Just before the conference, I finished my dummy book but I also needed several full colour spread and images to show at the critique. I only have a few days left to do the colours. Anyway, my illustrations were picked apart at the critique. I felt sad but still made the changes and studied more picture books trying to improve my illustrations. I was a newbie at illustration and wasn’t sure what my style was yet. I was told the eyes of my characters were too big which was out of trend already. Looking back at my illustrations, the art director was totally right. I cringe when I look at my old illustrations and my son would scream in horror.

After the conference, I made changes and submitted the dummy to agents and publishers on the list from the conference. I have to confess that it took another while for my art to improve. I studied the illustrations of artists that I admire and sometimes I would copy the illustrations and realized how much layers of colors they put into it. It’s not just coloring one single block, it’s layers of colors, like in paintings.

I needed the time and practice to improve my skills for sure.

You can download the Picture Book Thumbnail Template that I made here. This is a general guideline and commonly seen one. There are many other formats and page counts out there. I read picture books and look for ones that I like and fit with my story.

Leave a Comment

How to Make a Dummy Book

Making a dummy book for your story is important when you are still working on your manuscript because you can figure out visually if you want an illustration to fill a spread or how the page turns would affect your story. A spread is two pages side by side when you open a picture book.

I learned these concepts in my picture book class and it is part of the experience of reading a picture book. Maybe you dropped a hint and the readers will only find the answer when they turned the page. Maybe you want visual impact or something important on a spread.

I am writing this from the perspective of an author and illustrator. If the author and illustrator are different people, I think it’s the illustrator’s job to figure out how to use spreads and page turns based on the manuscript.

I read a lot of picture books with my son when he was younger and I would count the pages and see what goes on what page. When an author and/or illustrator uses the page turn or spread really well that adds to the story, I make a mental note of it. I also love to read what materials the illustrator used on the copyright section but not all books include these info.

There are a lot of information online about picture book formats and how to make dummy books. As a newbie, I found this very detailed explanation of a basic book construction very useful. Since most picture books have 32 pages, I just stapled 8 sheets of paper together to make a small dummy book.

Here are the steps if you want to make your own very simple dummy book:

1. Take 4 sheets of 8.5 by 11 inches letter size printer paper.

2. Fold the sheets in half and cut along the folded line. Now I have 8 sheets of 8.5 by 5.5 inches papers.

3. Take these 8 sheets of 8.5 by 5.5 inches papers and fold them in half.

4. Staple these 8 sheets of papers along the folded lines (You can sew them if you are feeling fancy or if your stapler is too small).

This is the very first dummy I made and the staples didn’t even align properly probably because my stapler was too small. Later I bought a long arm stapler because I got into book binding and started making my own notebooks/sketchbook/journal.

I drew my rough sketches directly onto these pages. You wouldn’t be able to read my dummy book at this stage because it is very rough and I scribbled notes all over it.

Later, I would just print out my text and illustrations separately, cut and paste them onto the pages. This way you can also play around where you want the texts to go on the pages.

Then I learned Adobe InDesign and paid professional printer to print out my dummy book in actual size to send out to publishers.

You can download my How to Make a Simple 32-Page Dummy Book cheat sheet here.

Leave a Comment

My Process for Making the Artworks for the Utility Boxes

I applied for the art wrap program over a year ago in Feb 2020. I had to submit a statement of intent, a CV and ten work samples. The public art program in my city selected a number of artists to be on the artist roster every two years.

Many cities have public art programs. Check out city websites and look for public art programs or call to artists. I signed up for their email notifications so whenever there’s an opportunity, I get an email. I look at the request for qualification, a detailed document explaining what they are looking for, to see if I am interested or qualified.

This spring, the program sent me the location of the two utility boxes that I would be making the artworks for. I was advised to respond to the location of the utility boxes. Since one of the boxes was outside a Gymboree Daycare/Preschool, I thought about making something with kids or animals in my initial sketches.

I superimposed some work samples that I have submitted to see how they would look. I also made some new sketches and photoshop’ed them on the utility boxes. I still had no idea what I would draw at this stage but I knew I wanted to have bright colours!

I went online to research anything I can find about the city of Richmond. I checked out the area on the map. I went to the utility boxes on location again. I remember getting the inspiration for my Art Column while checking out the actual column and walking the area. The utility boxes that I was assigned to were around the Olympic Oval very close to the Fraser River. I walked around the area, took pictures and made some sketches.

I remembered an article I read online while doing research about the conservation of eelgrass. Apparently, our Fraser River estuary has one of the most extensive eelgrass habitats in the world, providing food and shelter for a multitude of organisms such as juvenile salmon.

One of the articles I read said, for less than $6 per year per person in Greater Vancouver, it’s not too late to save 102 species at risk of extinction! It mentioned that five species of salmon, the white and green sturgeon are at risk. I decided to depict salmon and sturgeon with eelgrass for one of the utility boxes.

For the second utility box, I researched the other at risk species mentioned in the article and found the Western Sandpipers interesting. Millions of migratory birds from around the world use the Fraser River estuary as a resting stop to refuel during their long-distance flight. Western sandpipers consume diatom-containing biofilm covering the mudflats of the Fraser River estuary and they are at risk due to encroachment of shoreline habitats.  I googled diatom and found them to be out of this worldly beautiful!

Some artists even managed to arrange these microscopic algae into amazing art! You gotta check it out here.

I feel it took me more time and work to figure out what to draw than the actual drawing. Once I know what I want to make, the execution was quick. I had so much fun drawing, I made different art for all four sides and the top of the second utility box!

Once the art wraps were installed on the utility boxes, I realized the spec they gave me on one of the boxes was 11 inches short, so they had to cut off the legs of Western Sandpiper and most of my diatoms on one side. Thank goodness I did different art for all sides so you can still see the diatoms on the other side! Next time, I will double check the spec by measuring it again myself!

Finally, I had to submit an artist statement for the artworks and you can read it here.

Leave a Comment

Signing My First Book Publishing Agreement

After receiving the offer to publish, I talked to my mini critique club members and our SCBWI regional advisor. They advised me to compare my contract with the sample contract on the SCBWI website. The sample contract is a standard industry contract with explanatory notes by a lawyer on how to modify it to protect the authors and/or illustrators. You can find the sample contract in “The Book, the Essential Guide to Publishing for Children” on the SCBWI website. It contains over 300 pages of resources and is free to members. My SCBWI regional advisor told me to treat the offer as a business negotiation and to ask for what I think is fair.

My publisher is also a member of SCBWI and prefers to work with someone who’s a member. I spent a few days studying the contracts and asking questions. I think one of the first things to do if you want to become an author/illustrator is to join SCBWI and meet the members in your local area. There’s also a super helpful group called KIDLIT411 on Facebook that you can join for free. I find the people in the kid lit industry friendly and willing to help. It’s reassuring for a newbie like me to be able to ask experienced people questions and find answers.

In my mini critique club, someone was represented by an agent and she said her agent spent six months negotiating with the publisher on her behalf. Also, agents usually negotiate a higher pay for the author/illustrator because they take a cut from the pay. Another option is to hire a lawyer to go over the contract with you.

On the financial side of things, there is an advance payment and then the royalty. Advance is usually paid in instalments and you must earn out your advance before receiving any royalties. For example, if you are paid $2000 in advance, you must earn back the $2000 before receiving any royalties.

Check out this survey of 174 published picture book authors in 2017 about their advances and how long it took to earn out their advances.

Check out this post about the finer points of how royalties are calculated:

This page on SCBWI website answers some of the most frequently asked questions from how to get your children’s book published to how much you can expect to make on your first book:

https://www.scbwi.org/online-resources/frequently-asked-questions/

Around the time I was signing my publishing offer, #publishingpaidme was trending on Twitter. It was interesting to see how much some people are getting paid!

Leave a Comment

Getting a Publishing Deal on Twitter

I met Monica at my picture book illustration class. I asked to tag along with her to my first SCBWI meeting so I wouldn’t feel so scared. Later, she invited me to join her mini critique club with a total of five people. We met online every two weeks during the lockdown. I found the number of people perfect as everyone had time to share and we got to learn each other’s material well enough to provide constructive feedback.

One day, our mini critique club was helping me improve my cover letter and someone mentioned #PBPitch which was happening in a few days. For one day, authors and illustrators can pitch their story on Twitter. If a publisher or agent likes your pitch, you can submit your story to them. This reduces the number of cover letters I have to write and that is good news to me!

At first, I wasn’t sure if I want to try #PBPitch again because I didn’t get any likes the last time I tried. I am glad that I still researched #PBPitch on Twitter and on their website www.pbpitch.com to see how people write a pitch. I found a successful pitch that was similar to mine and used the format to re-write my pitch. I also improved my illustrations over the year and I think those helped because this time I got three likes and one of them became my publisher!

There are many pitching parties online and my publisher looks for author-illustrators this way so I highly recommend trying. Also, you will have to find a publisher that publishes the kind of story you write so timing is important.

My other secret that I am still experimenting with is to get happy first before taking action. Since the lockdown due to COVID-19, I’ve been spending time reading books and watching YouTube videos of my favorite spiritual teachers. One of my favorite teachers is Abraham-Hicks and she always says to be satisfied with the now before anything you desire can happen. So I spent some time doing meditation and researching how people write a good pitch. I only submitted when I felt good and inspired to do so (Abraham-Hicks often explains the difference between inspiration and motivation). Then I forgot about it. I didn’t check my Twitter for several days because I don’t want to feel something has to happen for me to be happy. I can choose to be happy now in my current situation.

A few days later, I checked my Twitter and saw that I got three likes! Again, I made sure I feel good before submitting my package. In another time, I’d probably rush through the whole process worrying if I didn’t do it quickly enough I’d miss out on the opportunity.

Soon after, I got an offer to publish and I was in disbelief!

Is Abraham-Hicks right? Does the universe really conspire to help us if we allow it? One of my favorite quotes from my favorite book The Alchemist:

#PBPitch happens three times a year. There are also many other pitch parties on Twitter such as #dvpit and #pitmad. If you Google “twitter pitch” you will find many lists like this 2021 Twitter Pitch Parties for Writers with dates and links. Check out their websites to see how to participate. And don’t give up! You never know when your next publisher will be on it!

Leave a Comment

Life Is The Dancer, And You Are The Dance

“There are three words that convey the secret of the art of living, the secret of all success and happiness: One With Life. Being one with life is being one with Now. You then realize that you don’t live your life, but life lives you. Life is the dancer, and you are the dance.” Eckhart Tolle wrote in his book A New Earth (Chapter 4, p115).

I first thought: How am I the dance and not the dancer? But I really felt a resonance with it even when my mind was unable to make sense of it. Is it proof that “I” and “my mind” are not the same thing? How can I feel the truth in it and not comprehend it? But I was inspired to draw dancers nonetheless…

Joseph Campbell ‘s “follow your bliss” has changed the course of my life since 2016.

He said the idea behind it came from the Sanskrit Sat-Chit-Ananda. Sat means being, Chit means consciousness and Ananda means bliss. He didn’t know exactly what being and consciousness were but he knew his bliss. By following his bliss, it led him to full consciousness and being. See his interview with Bill Moyers here.

I was obsessed with reading about Sat-Chit-Ananada for a while and came upon the teachings of a South Indian Sage Ramana Maharshi. In his teaching “Who Am I” he said:

“We know that the train carries all loads, so after getting on it why should we carry our small luggage on our head to our discomfort, instead of putting it down in the train and feeling at ease?”

This explained to me what “life is the dancer, and you are the dance” meant in a way that my brain can understand. But my artistic side liked the more poetic way it was described so I continued making art about dancers. Was it why Degas and Matisse paint so many dancers? Did they know the secret too? Now I know that my search for the Truth of life is also inspiration for my art. These two sketches of dancers were inspired by Degas and Matisse (one during his Les Fauves period, one during his later period).

Then I tried carving on plywood (the wood is too hard) and styrofoam printing:

Finally I made a GIF of uncoordinated dancers (that’s how I dance!) for welcoming the New Year!

Leave a Comment

How I Created My Website Using WordPress

In 2018, I took another picture book illustration class and we had to create a portfolio website for our final class presentation. There are many ways to create a website and some are free and easy to use for beginners such as Weebly.com, Wix.com and WordPress.com. I set up jenichenart.wordpress.com for the presentation and since it’s free, you will see wordpress.com after my name.

The teacher talked about Behance which is an industry specific network for creatives to showcase their work. Art directors go there searching for talents and you may get freelance work from there.

After some consideration, I decide to set up my own website JeniChen.com using WordPress.org. Unlike WordPress.com, WordPress.org (own by the same company) provides more flexibilities, including search engine optimization (SEO) functions to increase traffic to your site and you get to own/control your content, yay! The downside is that if you don’t have any technical backgrounds, there’s a learning curve. But there are so much information and tutorials out there, you can google your way into some proficiency. No coding or html knowledge required.

When people want to find you on the internet, they usually search by name. That’s why it was recommended that we snatch up the domain with our name in it as soon as possible. I purchased my domain name JeniChen.com and web hosting from GoDaddy. In 2019, Google flagged my site as unsafe because I did’t have something called SSL certificate. GoDaddy charges $99.99 per year to have this SSL certificate while some other hosting companies provide it for free. I will be looking for new hosting company soon.

Here are some basic general steps to get started:

1. Buy a domain name and web hosting plan. WordPress.org recommends these three companies.

2. Follow the instructions from your hosting company to install the free/open source code on your own hosted site.

3. Start playing with every button and functions on the backend. Google anything you are trying to do. I just googled “how to have different themes on wordpress” and found step by step instruction on how to do just that. I wanted my portfolio and my blog to have different looks and different functions.

Sometime I thought I was way over my head and I should just hire a professional to do it. Other times, I found the challenge interesting. It’s like finding the pieces to a puzzle that was a vision in my mind and I can change it anytime I want. When I found the missing piece to the puzzle and made it work, how satisfying it felt! 

PS.  My site is a basic portfolio and blogging website that gave me a presence online that’s my own. There are many ways and options to build a website. This article is about how I build my portfolio and blogging website JeniChen.com using WordPress.

PPS. I just learned that anything you put on WordPress.com, they can use for free and they can shut you down like Facebook/Twitter, etc. On the other hand, you own your content on WordPress.org.

Leave a Comment

Fake It till You Make It or Being Present?

I didn’t work on my picture book story from the time I wrote it down in 2016 until I took a second picture book illustration class in 2018. What had I been doing during those two years? Although I loved to draw as a child, I had no formal training in art. I remember thinking that I needed to learn some basic concepts in art and illustration before I could tackle this project. So I enrolled in the Fine Art Certificate Program in my local art school. Now I am working on my debut picture book, I still feel I am not ready sometimes. I have so many excuses such as I am a newbie and I don’t know everything yet. Then my publisher announced the book deal and I posted the news on Facebook. Once my family and friends knew about this, I started to panic: What would they think about my book? What if they didn’t like it?

These kinds of thoughts made me feel overwhelmed and stressed. Then I saw a video (starting at 1:55:29) where Eckhart Tolle talked about writing his best seller The Power of Now (this book has the coveted spot on my night stand).

1. He felt an urge to write the book. It was like something wanted to come into being and he became a channel. He talked about the purpose of the universe is to create and express through us in another video.

2. If you become stressed while doing it, it’s because you are attached to the outcome (ie. to write the book in order to become famous or rich, etc.)

3. The practice is to be present. Enjoy the doing, the action IN THE NOW which is more important than where you want to get to.

It was just what I needed to hear. Besides, we learn in real life situations and not in a vacuum. I am grateful to have this opportunity to learn while doing it. Whatever the result is will depend on the quality of this moment. So all I need to focus on is this moment. Am I doing my best? Am I enjoying it and allowing the energy to flow into my work?

Debbie Ridpath Ohi (children’s book author/illustrator) said it brilliantly in her comic You May Be Luckier Than You Think. I just have to appreciate where I am now and enjoy the journey.

Leave a Comment