Making a dummy book for your story is important when you are still working on your manuscript because you can figure out visually if you want an illustration to fill a spread or how the page turns would affect your story. A spread is two pages side by side when you open a picture book.

I learned these concepts in my picture book class and it is part of the experience of reading a picture book. Maybe you dropped a hint and the readers will only find the answer when they turned the page. Maybe you want visual impact or something important on a spread.
I am writing this from the perspective of an author and illustrator. If the author and illustrator are different people, I think it’s the illustrator’s job to figure out how to use spreads and page turns based on the manuscript.
I read a lot of picture books with my son when he was younger and I would count the pages and see what goes on what page. When an author and/or illustrator uses the page turn or spread really well that adds to the story, I make a mental note of it. I also love to read what materials the illustrator used on the copyright section but not all books include these info.
There are a lot of information online about picture book formats and how to make dummy books. As a newbie, I found this very detailed explanation of a basic book construction very useful. Since most picture books have 32 pages, I just stapled 8 sheets of paper together to make a small dummy book.
Here are the steps if you want to make your own very simple dummy book:
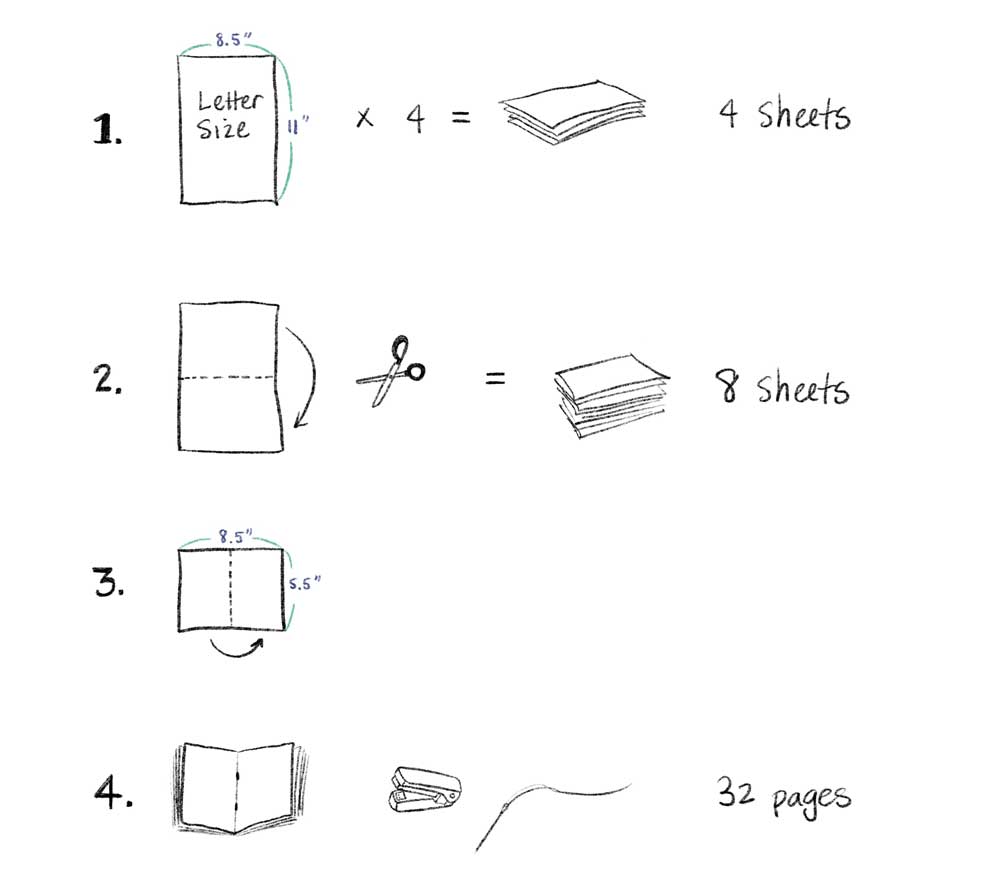
1. Take 4 sheets of 8.5 by 11 inches letter size printer paper.
2. Fold the sheets in half and cut along the folded line. Now I have 8 sheets of 8.5 by 5.5 inches papers.
3. Take these 8 sheets of 8.5 by 5.5 inches papers and fold them in half.
4. Staple these 8 sheets of papers along the folded lines (You can sew them if you are feeling fancy or if your stapler is too small).
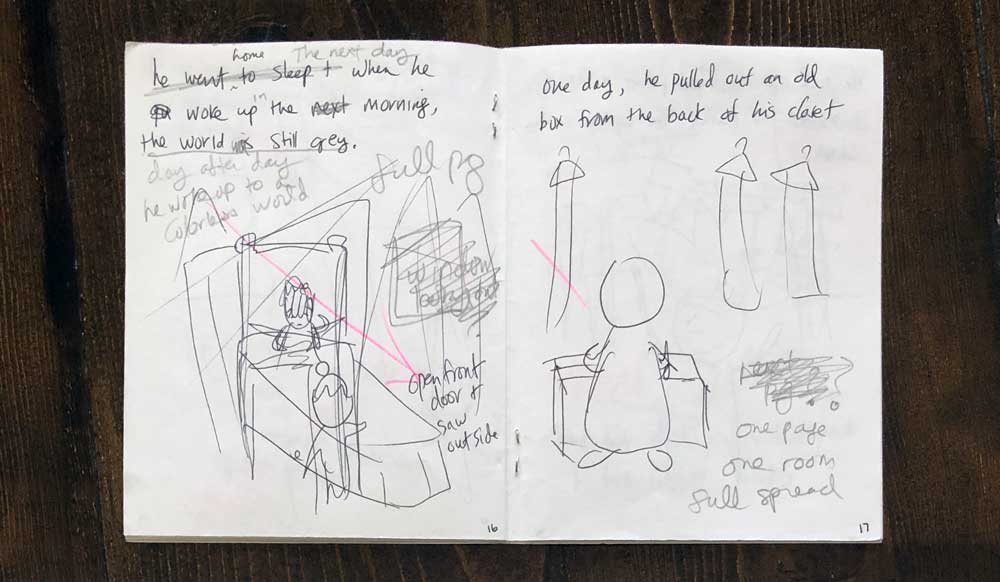
This is the very first dummy I made and the staples didn’t even align properly probably because my stapler was too small. Later I bought a long arm stapler because I got into book binding and started making my own notebooks/sketchbook/journal.
I drew my rough sketches directly onto these pages. You wouldn’t be able to read my dummy book at this stage because it is very rough and I scribbled notes all over it.
Later, I would just print out my text and illustrations separately, cut and paste them onto the pages. This way you can also play around where you want the texts to go on the pages.
Then I learned Adobe InDesign and paid professional printer to print out my dummy book in actual size to send out to publishers.
You can download my How to Make a Simple 32-Page Dummy Book cheat sheet here.