Skip to content

Category: Uncategorized

My book launch check list

It’s March already! My debut picture book Emet’s Box is coming out in less than a month on April 1st!

My publisher The Little Press helped me set up pre-orders of my book with a US bookstore The Wandering Jellyfish Bookshop (love the name).

Or you can pre-order my picture book on Amazon, Barnes and Noble and IndieBound.

For my Canadian friends, you can find Emet’s Box on Canadian Amazon link here.

There are so many details to take care of, I felt a bit overwhelmed and don’t know where to start. I’ve been reading about book launch and book promotion, etc. Here are some of the resources that I found helpful:

1. If you are SCBWI member, you can download “The Book – the essential guide to publishing for children.”

2. Your publisher probably has something to help you with – my publisher provided several Zoom sessions to help us learn the basics (I will organize my notes and share it on the blog someday).

3. Soaring 20’s has some great resources about how to start a release group to promote your books.

4. Diverse Voices’ DVdebut Program has some great resources and webinars for debut authors and illustrators.

5. Seth Godin’s advice for authors   

6. Google book launch or book promotion/marketing

Here are my notes and checklist:

1. Release group – join or form release groups (I formed a group 15 months before my release date) Check out the resources by Soaring 20’s

2. Social media

  • Actively follow influencers and target audience to build following
  • Plan posts on social media (I wrote about my plan in this blog post)
  • Set up LinkTree with pre-order links
  • Book cover/info on social media (You can create your own graphic using Canva – see samples on my Twitter or Facebook page).

3. Website

  • Plan blog content
  • Post blogs on social media
  • Book cover/info on website

4. Newsletters – read Seth Godin’s advice for authors to learn the value of email newsletters.

5. Cover Reveal (8 months before release, mine is done by my publisher)

+++

TO DO:

  • Reach out to blog/podcast influencers – offer giveaway to their audience
  • Events/festivals/tabling
  • Contact local news outlets
  • Send info to school for visits
  • Contact libraries – offer signed books, author visits
  • Contact bookstores – offer signed books, author visits
  • Community Centers
  • Co-promote with local businesses that are related to my book
  • Put together street team

ONE MONTH BEFORE RELEASE (MARCH 1, 2022)

  • Pre-order campaign – Graphics with title, cover, picture of all swag (bookmark, sticker, etc), publication date
  • 2 promo posts on social media per week with pre-order link
  • Guest interviews with bloggers/podcasters
  • Events or live videos on social media with release group
  • Consider advertise on social media to target audience

LAUNCH DAY (APRIL 1, 2022)

  • Launch day event, book birthday
  • Giveaways on social media (to promote book, website, blog, social media) – swag bag, limited edition art print, etc
  • Ask street team to post reviews on Amazon/B&N/Goodreads and to share on social media/help boost promo posts
  • Do as many events as possible this month (April 2022)

POST LAUNCH

  • Share reviews on social media
  • I have to do 10 school visits per my publishing contract
  • Ask libraries to request my book Emet’s Box (Libraries may need to see some reviews before they will order)

As I am writing this blog post, I am doing some of them and checking off the list. And as I put together this list, it helped me organized the information and my thoughts. I tell myself that I can do a little bit everyday and they will add up. Hope this helps!

Leave a Comment

Making my first Youtube video

I was making my very first video yesterday (I wrote this post back in June 2021, I’ve added a little note of my writing process at the end of this post). The video was just a short intro to the online workshop that I will be doing for the BC Culture Days. I thought it would be good practice for the real thing. First I wrote down what I would like to say in the video and asked my husband to help me record it.

My initial reaction upon seeing the recording was cringe! I sounded so weird and awkward! I have new found respect for actors and actresses. I sounded robotic and I couldn’t even remember my own script.

After a few takes and watching several videos of myself, I kind of got used to hearing my own voice. The mistakes I made were kind of funny too. I asked my husband to keep them in the video but he edited them out and compiled a reel of bloopers which was the best part. Too bad my husband deleted it.

It’s kind of scary to put myself out there like this at first, to record myself on video for the public to view. I asked my son and his friends to join me, not just to make the video more interesting but also to give me courage.

Then I remember I was also scared to put my comics on social media for people to see at first.

My friend sent me a video about Charles Schultz: The Untold Story of Charles M. Schulz, the maker of the comics Peanuts. That he learned to accept himself and believed that if thing were meant to be, it’d work out. He never gave up on his passion and kept trying even after multiple rejections.

A TED talk I watched about The strongest predictor for success is Grit. I guess if you love something, having grit is easier than if you don’t love it.

So making art has led me to putting myself out there, to open myself up more and having the courage to be vulnerable. All for the sake of love… because I love art!

Note: This post was written back in June 2021. I usually wrote down whatever I was thinking when I had the inspiration. I’ve learned that if I had an idea, if I don’t write it down right away, I usually lose the feeling or flow of it later. I could reconstruct it and write about the idea later but it’s just different or lacking somehow. I am happy that I wrote down my first manuscript for my picture book Emet’s Box in the early hours of the dawn. I wrote about that process in another blog post here. Now I know it’s better to write it down right away and edit later.

Leave a Comment

2021 Year End Recap

It is almost the end of 2021.

A lot have happened this year and I’ve learned a lot.

Two of the most important things that I’ve learned are to keep trying and to appreciate whatever I have right now.

At the beginning of the year, I had not much going on (except working on my picture book which is important to me) but I kept applying to artist calls. Sometimes I didn’t get them but I’d learn something from the experience. Maybe I learned from the interview about what the jurors were looking for. Maybe I created artwork that could be added to my portfolio or maybe I got new ideas for some other projects. Sometimes, getting rejections were hard and I didn’t want to try anymore. But I told myself what’s the harm of just applying to another call. Then I would get something and I felt good about having tried.

Writing grants and applying to artist calls has become part of my life. I have no idea what I will be doing in the next 3-6 months but in a way, that’s an adventure. I am walking on a path that’s lit by light about only one foot in front of me but I believe there’s some universal force guiding us.

I love what Joseph Campbell said about the Knights in search of the Holy Grail that “Each entered the forest at a point that he himself had chosen, where it was darkest and there was no path. If there is a path it is someone else’s path and you are not on the adventure.”

I am going with the flow of life. The force that guides the stars guides us too. I love to think about the universe, how immensely expansive it is that we can’t even imagine with our little human brains. This makes me touchy feely and I realized my birth name in Chinese means literally “Think Universe.” Maybe it was a clue that I gave myself when I came here?

Leave a Comment

How I set up my newsletters

On my blog, I have a signup form “Subscribe here to get the latest blog post via email” on the right sidebar. Every month, an email will be sent out to my subscribers with any new posts I have on my blog. After a while, I wanted to make changes to that email template but I’ve forgotten how I set it up in the first place. I am writing this blog post as a reminder for myself and for anyone who wants to know how I set up my newsletters.

I use Mailchimp which is free for the number of subscribers I have and for the functions that I am using right now.

First, I need to create a subscribe form to put on my blog for people to opt-in to receive my posts on a monthly basis (that is my newsletter right now). After you’ve sign up for Mailchimp, you can create different kinds of signup forms. Under their Audience menu, you will find the Signup Forms menu. I used the Embedded forms following these steps to generate the HTML codes that I then plug into my blog.

I use WordPress for my website and blog. You can read about how I set up my website and blog here. I had to find a WordPress theme/template that allows me to add a Custom HTML widget to the sidebar of my blog because that’s where I want the signup form to be. I searched for WordPress themes with sidebar and made sure it has the widget that allows me to input my own HTML codes.

It may sound complicated but both WordPress and Mailchimp interface are pretty user-friendly for regular people like me without computer trainings. I just Google how to do something I want and try out different buttons on WordPress and Mailchimp to see what they do. I confess I kind of enjoy the process.

After I’ve generated my codes for the Embedded Forms on Mailchimp following these steps, I copied the code and pasted into my custom HTML widget on my WordPress. The satisfying part was seeing the codes transformed into a signup form on my blog.

Then, I followed this article to share my blog posts with my subscribers automatically every month or however often you want it to be. One of the things I had to figure out was my RSS feed. If your website is powered by WordPress (mine is), then all you have to do is add /feed/ to the end of your website URL. For my site, my RRS is simply: https://jenichen.com/feed/

The part I forgot is how to modify my email template. I can drag and drop their RSS content blocks to my email design. Once I dropped the blocks (RSS Header or RSS Items) I can select different options of the block. Their detailed instructions for doing this is here. You can also use something called Merge Tags to customize your email template to display different information.

For a while, if you sign up for my newsletter, there is just a sentence saying “Thank you for subscribing” in tiny fonts at the bottom of the form. Finally, I’ve made a banner for my newsletter template, set up a welcome email for people who signed up. I Googled the size for a Mailchimp banner, look at other people’s banners, and searched examples of good welcome email online. The banner size I settled on is 1200x500px. You can go wider at 1200×675 pixels or narrower at 1200×400 pixels. I just picked a random height in between these two.

To set up a Welcome email, follow these steps. Once you finished setting up your template, you can preview it in Mailchimp and/or send yourself a test email to see how it will look. You can find and modify your blog post update and welcome email setting under Campaign.

Check out my email template by signing up here for my newsletter/blog post updates. Let me know what you think or if you find any bugs.

Leave a Comment

My Social Media Posting Schedule

Seth Godin said in his popular Advice for Authors blog post that “the best time to start promoting your book is three years before it comes out.”

I also like what he said that a book is a souvenir and it’s a way for you to spread an idea. I agree that’s how I buy books. Sometimes when I read a book from the library and love it so much that I have to have a copy in my collection (a souvenir). As for why I wrote Emet’s Box, it is because as a mom and volunteer at school art programs, I see how brilliant kids are. They are naturally creative but sometimes I feel some of them try to hide themselves to conform to what the adults want. I want to encourage kids to be who they really are, the joyous, creative beings and shine their lights onto the world. That’s the meaning behind this “Shine Your Light” illustration on my Twitter.

My publisher recommends posting consistently on social media for at least three times a week. You can pick one platform you enjoy to focus on because if someone likes your work, they will follow you across different platforms.

Twitter has a lot of writers. Instagram has more educators and artists. Although I am finding more painters on Twitter, probably because I started following #painting. I created a Facebook page recently because my publisher said maybe my friends don’t want to keep seeing my art on my personal page but if they are interested, they can follow my Jeni Chen Art page.

At first, I felt overwhelmed even posting just one post per week. I didn’t know what and when to post and I would just post random stuff at random time.

I wanted to figure out the best time for me to post so I made a schedule of the different times my followers are online. I found the info somewhere on the Instagram app under Professional Dashboard. I made a schedule of all the times that I can post to reach the most people on a sheet of paper (see below):

I have no idea if I am reaching more people but this schedule had made posting on social media a lot easier for me. I can plan ahead on what I am going to post and schedule my posting with Creator Studio for Facebook and Instagram, and with Tweetdeck for Twitter.

I also started drawing Emet on different holiday like Remembrance Day and Thanksgiving to post on those days. It’s fun draw Emet in different situations.

It’s been one month since I’ve been following this schedule. I will try it for another month but I can already see that I have more engagements on Wednesday.

I think there are lots of companies that help you figure out precisely what and when to post but I am still not very sure about social media.

I saw some news recently that Lush Cosmetics has stopped using social media because their purpose is to help people switch off and relax, to pay more attention to their well-being while social media is doing the opposite. I thought that was very admirable of Lush, to do something that is true to their brand, despite the possibilities of losing some eyeballs. And I like their new message on social media:

Leave a Comment

My 6-month mentorship experience

As part of the BC Culture Days Ambassador Program, I got to select and work with a mentor with over 25 years of experience, Natasha Smith. I found Natasha online and her paintings were so rich and interesting to look at! After Natasha agreed to be my mentor, we started meeting on a weekly basis over Zoom. In addition, we communicated by emails and texts.

During our first meetings, we worked on setting goals and preparing for my BC Culture Days online workshop. I’ve never made an online video before and Natasha showed me the equipment that she uses, how to edit and add sounds to my video.

One of my goals during the mentorship was to make a body of work in mixed media paintings and submit to juried exhibitions. At first, I didn’t know what kind of painting I want to make for my body of work. We looked at my past paintings and paintings of other artists that I admire to figure out what kind of art I want to make. She encouraged me to do research, find a topic that I am passionate about, and practice the techniques so when I decided on what to do, I know HOW to do it. Natasha showed me many new techniques that I can incorporate into my paintings. Talking with her every week helped me work out my thoughts. It’s like brainstorming with an expert and I often got more ideas from our conversations.

We also started working on my application to an Artists in the Classroom grant. Natasha was so organized and she’s very good at keeping me on track. She would encourage me to just jot down my ideas to start with and suggested me to take some small steps every week. Those things add up incrementally. Writing a grant is a daunting task. I have to confess that without her help, I probably would have put this project on hold. I don’t know the result of the grant yet but I have many school interested in my project and one of them agreed to pay for the project themselves.

Natasha gave me encouragement to work on my strength, practice my skills and we talked about why I make art and worked on my artist statements. She shared with me many resources and tools on being creative, time management and how to overcome creator’s blocks.

One of the challenges that I had was feeling the pressure to perform, that I have to make good paintings the first time I try and if I don’t think I have a good idea, I just procrastinate. We talked about the importance of experiment and play. She shared her experience that sometimes you start with a good idea and sometimes, good ideas come out of practice. It’s important to practice my skills and when I have a good idea, I will have the skills to express them intuitively because of practice. She inspired me to schedule time for play and for improving my skills without thinking about outcome.

What I found extremely helpful with the mentorship was talking to someone with a lot of experience like Natasha. It was lonely making paintings on my own without much feedback. During one of our very first meetings, Natasha pointed out what she saw in my paintings and what my strengths are. I couldn’t really see my style until she articulated that I like to use painterly colours with bold graphic elements which I do subconsciously. Then she showed me new techniques based on my preferences to add to my artistic arsenals.

Not only did I learn a lot from my mentor Natasha, she also gave me a lot of encouragement and that helped me see my strength in my art and gave me the confidence to go out and try more things. The weekly meeting is a great way to keep me accountable and make sure that I do the work.

Natasha Smith is an excellent mentor with a lot of experience in many aspects of being an artist. I’ve achieved all my goals set out at the beginning of our mentorship. Not only did Natasha showed me many new mixed media techniques, her holistic approach helped me pinpoint my style and clarify my artist statement; we worked on my mindset to overcome obstacles, she kept me on track and showed me tools to manage my art career. More importantly, her encouragement gave me the confidence to experiment with new things and make more art. I highly recommend Natasha Smith for anyone who wants to find their unique creative path.

You can find Natasha Smith on her website: https://natashasmithart.com/

More info on her mentorship program here: https://natashasmithart.com/creativefettle

Leave a Comment

Paintings I made during Mentorship: Part II

Here are all the paintings I finished during the 6-month mentorship with my mentor Natasha Smith.

Let me know which one you like the most?

If you want to see the process pictures, check out the previous post.

#1 – mixed media on recycled wood, 6.75″W x 11.5″ H
#2 – mixed media on wood, 8″W x 10″H
#3 – mixed media on recycled wood, 10″W x 13.5″H
#4 – mixed media on recycled wood, 3.75″W x 3.75″H
#5 – mixed media on recycled wood, 5.5″W x 3.5″H
#6 – mixed media on canvas, 12″W x 16″H
#7 – mixed media on paper, 12″W x 16″H (without frame), 17″x21″ (with frame)
#8 – mixed media on wood, 12″W x 16″H
#9 – mixed media on paper, 4.75″W x 6.75″H (without frame), 9″x11″ (with frame)
#10 & #11 – mixed media on paper, 7.5″W x 9.5″H (without frame), 12.75″x16.75″ (with frame)
Leave a Comment

Paintings I made during Mentorship: Part I

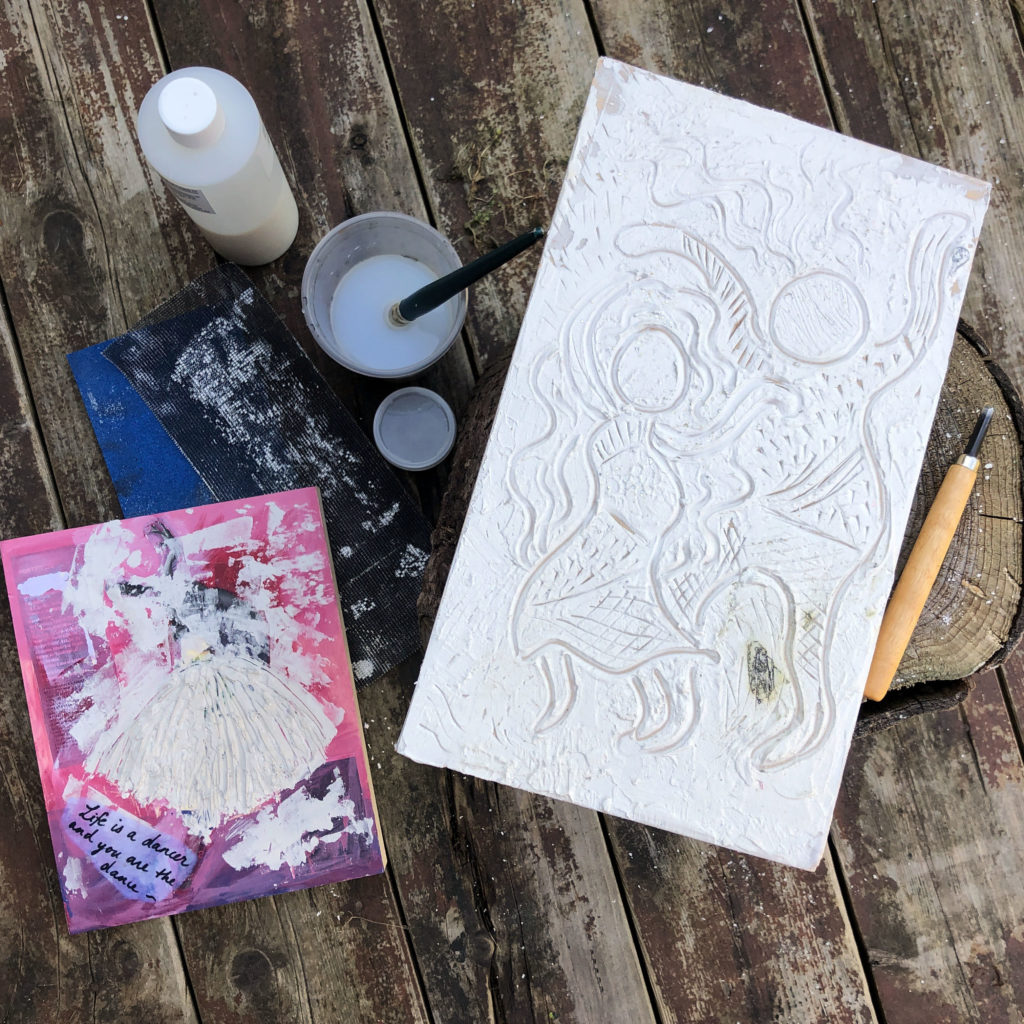
The first painting I worked on with my awesome mentor Natasha Smith was the two dancers (below left, the larger piece). I didn’t know what to paint so I started with the last theme I was working on based on the quote “life is the dancer and you are the dance.” I wrote a blog post about how it inspired a series of artwork last year.

I also had an old, unfinished dancer painting, and I tried to re-start it again in June 2021 (below left, the smaller piece).

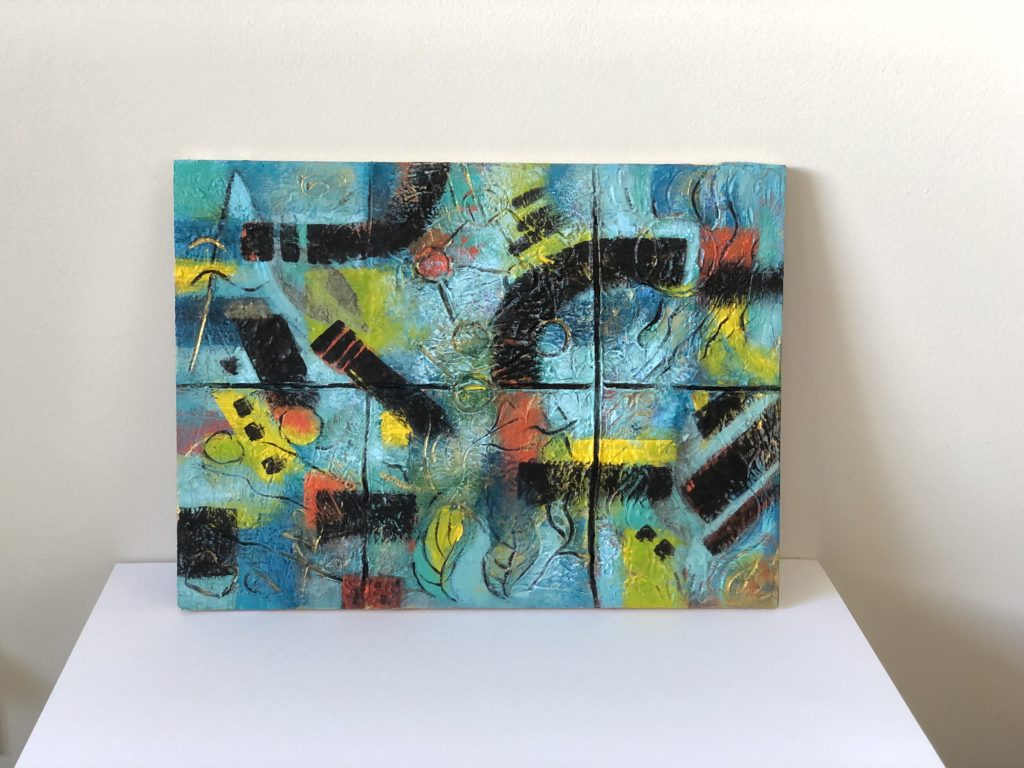
In July, I started another painting using the same dry wall technique but wanted to try out more layers (below right). I had a concept of what I wanted to do but didn’t know what it all meant until it was selected for a juried exhibition and I had to write an artist statement. Read about it in this blog post.

Here are photos of the finished paintings:

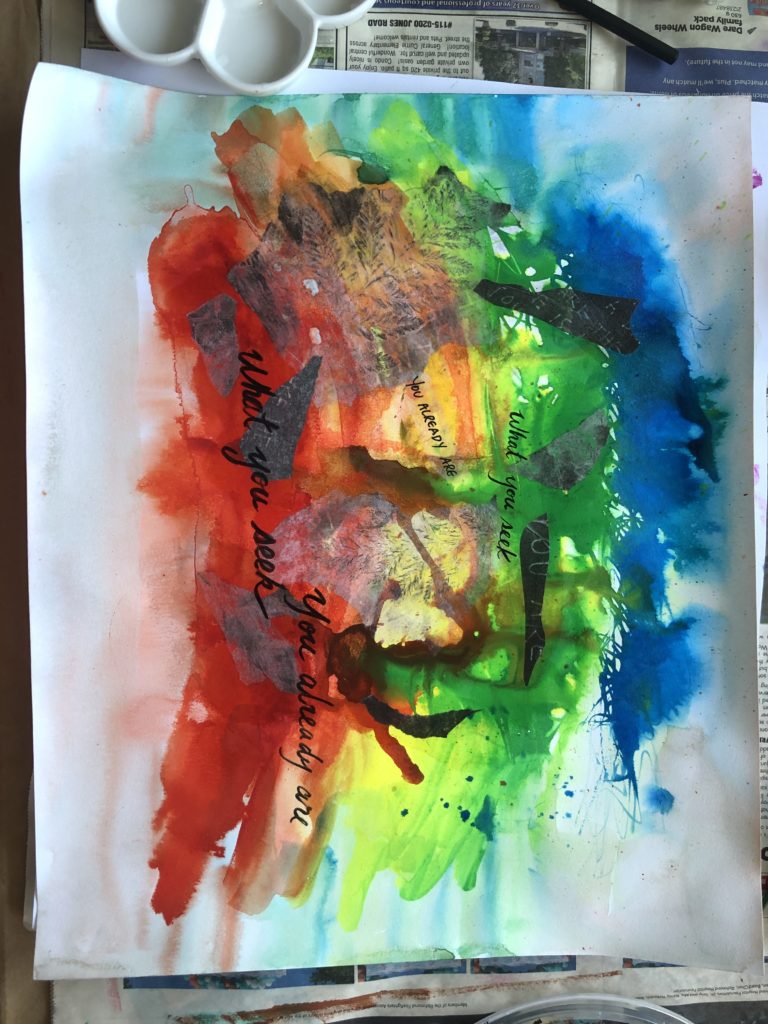
I took out another old, unfinished painting on a small piece of plywood (below) and tried out some other techniques my mentor had shown me. Again, I used another quote I liked “What you seek, you already are”. My husband and my son said I need to work on my handwriting.

I found a small piece of left over plywood from my parents’ garage and decided to carve it (pictures below). I really enjoy working on small wood blocks like these. My brother has been doing some woodworking recently and I asked him to cut the leftover MDF board into smaller pieces that I can use to make more inspirational quote paintings. The quote below “You are never alone or helpless. The force that guides the stars guides you too” was from an awesome Ted Talk I watched about consciousness.

My mentor Natasha has shown me many printmaking techniques. I invited my son to make some prints with me. His refusal to follow instructions had led to new discovery that I used in later works.

In August, I tried to do some experiments on paper. Later, the piece on the right led to another work on paper (bottom left) and one on canvas (bottom right).

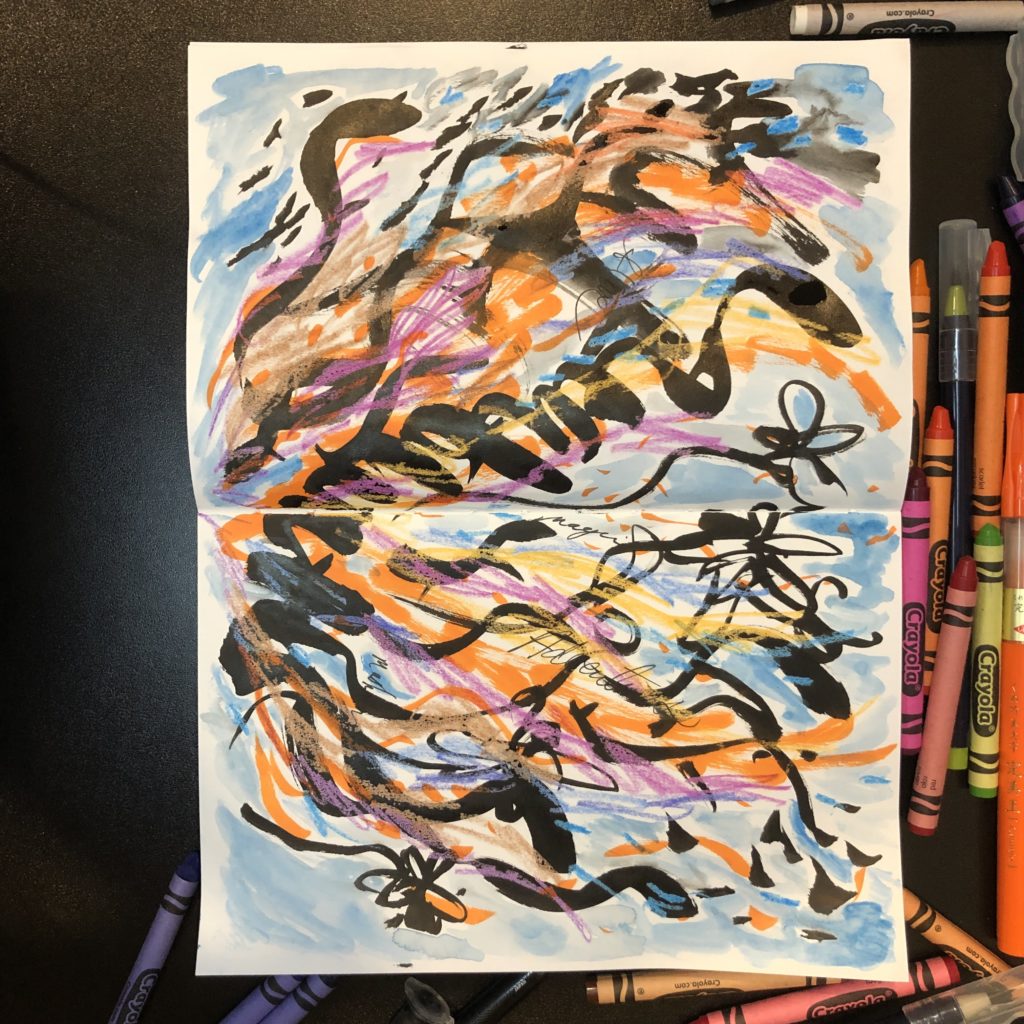
Around that time, I was making an Art Journaling for Beginner’s video for BC Culture Days. As a practice, I recorded myself working on one of my art journal spread (below left). That spread led to a piece on paper (below middle) and one on wood (below right). I plan to edit my practice video and share that with you.

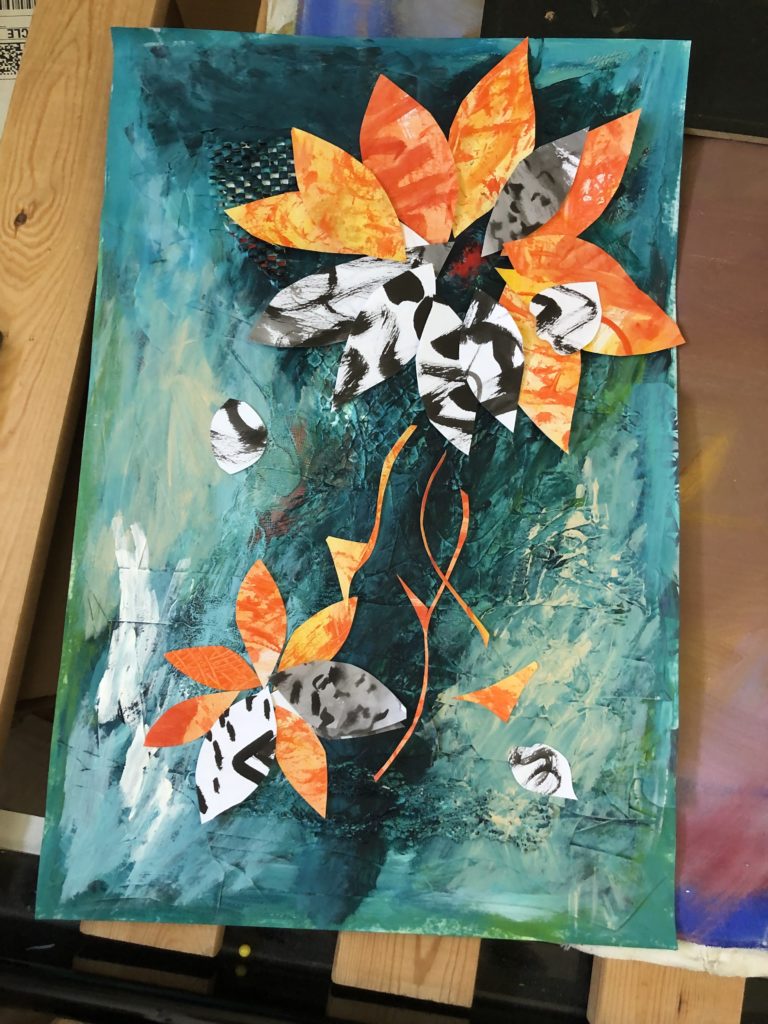
In September, I made more art journal pages. They were just play for me with no particular results in mind. I was using materials readily available around my desk and I was watching/listening to Youtube videos at the same time.

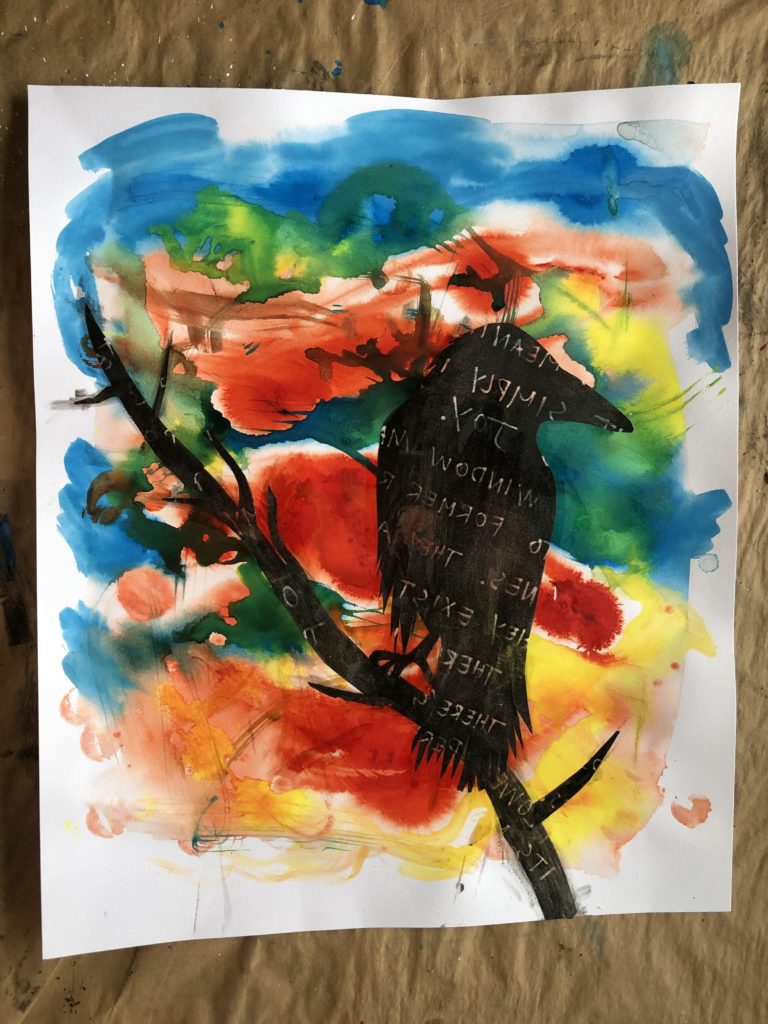
Again, I had to grab my Chinese ink and brush because I really like the free form they created. I particularly like the sketch in the middle so I created more art based on that (see below). During the time I was working on these paintings, I was reading a book called Zen Buddhism by Christmas Humphrey and he was talking about the influence of Zen Buddhism on Chinese and Japanese art. I looked at the ink stick that I had for a long time and realized there’s an ancient Buddhist poem or sutra carved on it as decoration. All these discoveries had led me to consolidate why I make art (another blog post later) and the development of my artist statement.

I am experimenting with more works on paper (below). These are not done yet and I don’t know where they will lead me but one of the most important things that I’ve learned from this mentorship is the importance of play. At the beginning, I would put pressure on myself to make good art every time. This pressure to perform stifles ideas, takes the fun out and made me procrastinate. Now I just tell myself to do some sketching everyday. Simple sketches, random stuff, ugly drawings are all good as long as I put my pen to paper. As we can see from above, sometimes, playing in my sketchbook/art journal with no particular goal in mind led to new painting ideas that I love!

Leave a Comment

Process of creating the painting: Elements

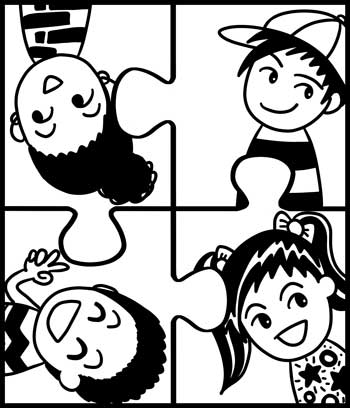
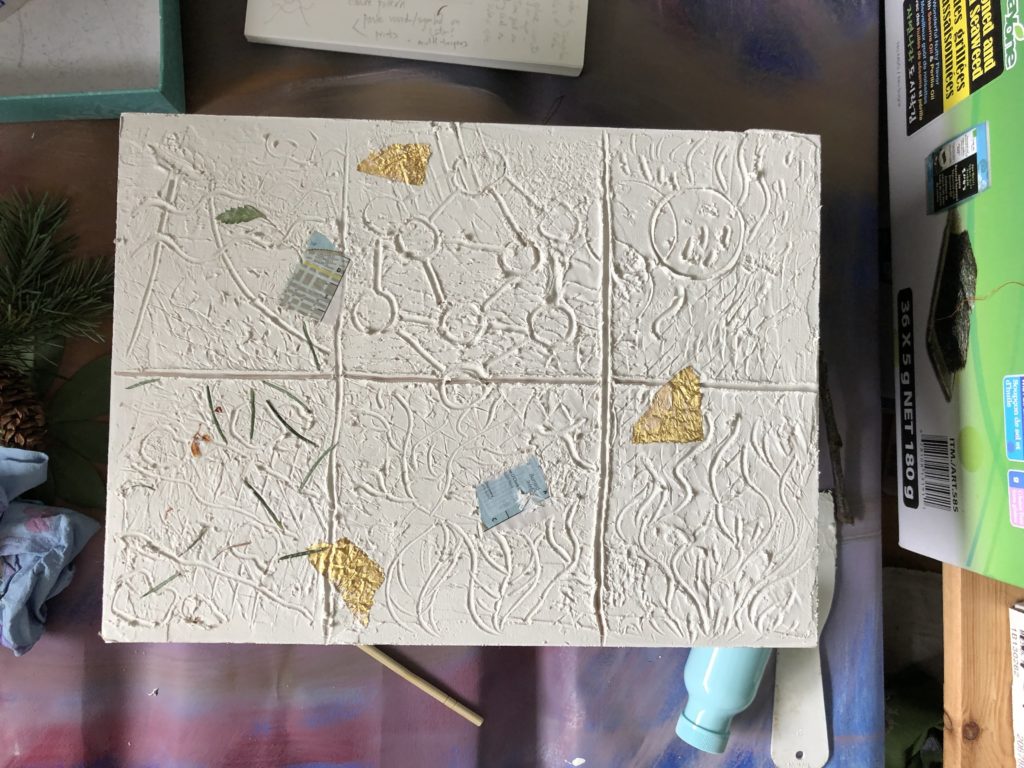
As part of the BC Culture Days Ambassador program, I got to work with an awesome mentor, Natasha Smith, with 25+ years of experience. She showed me a technique using dry wall compound. My original idea was to include natural elements that inspire me and to make the painting looks like a puzzle. In addition to plants and flowers, I think this concept of putting a puzzle together is also a recurring theme in my art, like this illustration:

I thought I would put the 5 elements that the ancient Chinese thought made up everything between heaven and earth: metal, wood, water, fire, and earth. Earth is repeated so I have the 5 elements plus the heaven carved into the 6 blocks on my painting. 

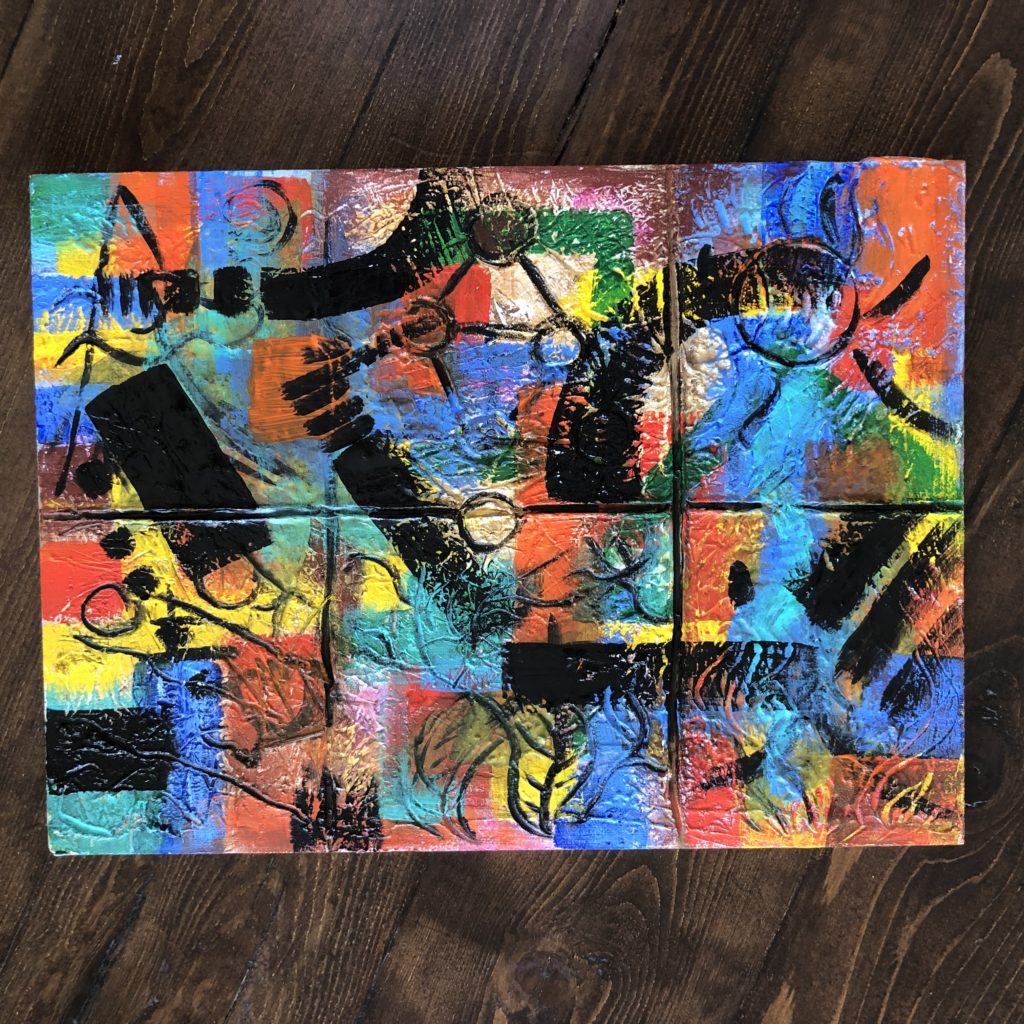
At the beginning, I used colours that represented each element. Sky and water are blue, fire is red, metal is gold, earth is brown. They looked pretty bad and I’ve learned from illustrations that we don’t need to use realistic colours. So I painted over them with more colours in geometric shapes. I added more collage elements from prints I made from real leaves (another technique my mentor showed me). I painted the carved lines of the elements black, added more colours in lighter shades and added thick black lines over them.

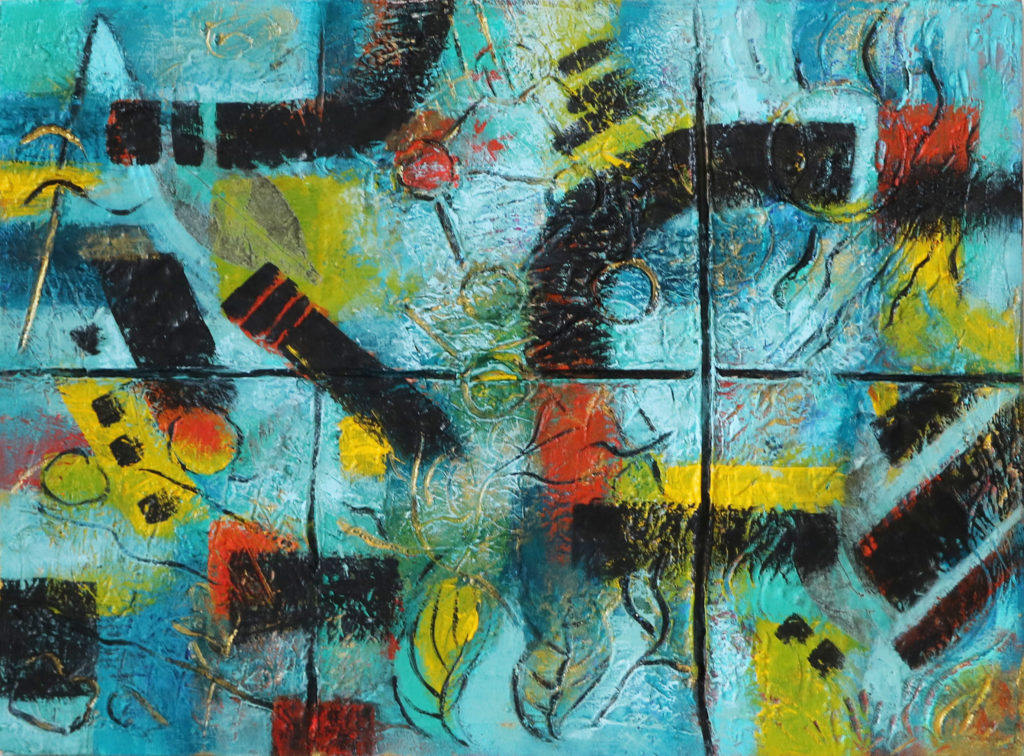
I kind of like this painting with lots of colours. At the time, my mentor Natasha was showing me colour harmony and the use of colour in paintings. I was planning to make another painting using the colour concepts I just learned for comparism. Then I saw a call for submission for a juried exhibition held by the Community Arts Council of Richmond. The deadline was coming up soon so I decided to paint over this painting with a new colour scheme.

I’ve taken a class on colour theory before and learned how to mix colours. But this time, I have an actual painting to work on. There’s a big difference between learning about the theory and applying it.

First, my mentor Natasha said add small amount of dark colours to lighter colours. I had been mixing colours the other way around. It sounded like minor stuff but it really made a difference! Blue has more value than red than yellow so just a tiny bit of blue will change the color of yellow quickly. If I add yellow to a big blob of blue, I will never get the colour I want unless I use the whole tube of yellow (maybe more).

I started making colour charts, mixing tints and shades of a colour by adding white or black. Then I started mixing two different colours, add white or black. I can also add white to a colour first and then add black. I get all kinds of different colours mixing them in different orders.

Here are what I’ve learned from making this painting that was selected for the Mid-summers Arts Dream exhibition.

#1. Don’t use colours straight from the tubes!!! Mix my own colours to make the paintings more interesting. This reduces the saturation which I found the case when I first started adding more colours to this painting. Yellow may be an exception, I used this colour straight out of tube in some places.

#2. Another reason to mix colours is to create harmony. I mixed blue and green to different degree, blue and yellow, then yellow and red so all the colours are related.

#3. Warm and cool colour constrast. I decided to make the backgrounds mostly cool because of the sky and water and to bring back the orange and yellow for contrast. I mixed the yellow in some areas with a tiny bit of blue and the yellow is related to the orange I mixed. I had a lot or orange at the beginning. I tried to erase some of them and see if they still worked and I felt by removing some oranges didn’t lessen the painting.

4. Value contrast. In addition to warm and cool colour contrast, there’s dark and light contrast. Sometime you can see dark and light by squinting your eyes when you look at the painting but I just take a picture and make them black and white on my phone to check. I didn’t have much dark and light contrast so I lightened the blue around my bold black stripes.

When I use my iPad, I can just pick and choose the colours I want to use very easily. With paint, you have to physically mix the colours and sometime I couldn’t get the exact same colours. There is so much to learn and I am planning to make another one with warmer colour scheme (maybe because it’s almost November now). I have new found respect for painters that use colours beautifully!

Here’s the before and after again. Which one do you like more? In the before painting, my eyes just go all over the place. In the after painting, my eyes go to the black first, then the yellow and orange and kind of follow the black stripes around the painting clockwise. How about you?

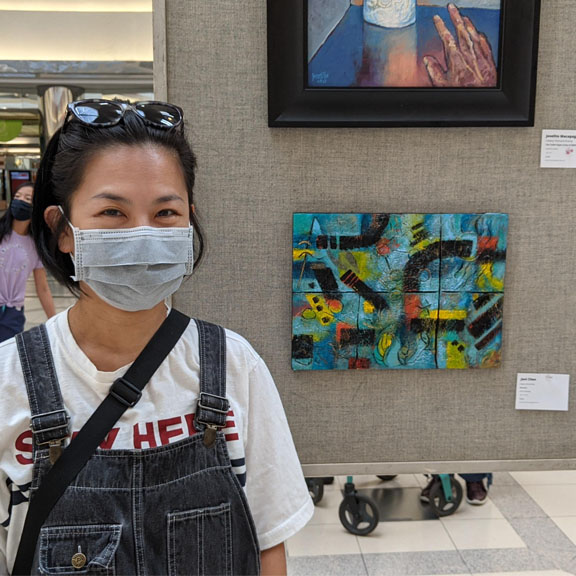
After I found out the painting was accepted into my first exhibition, I painted the sides black, added a hook (my husband Jordan did) and signed the back. I also have to write an artist statement:

In Elements, I investigate the diverse yet interdependent nature of the universe: heaven and the five elements of metal, wood, water, fire and earth. The concept of the five elements is widely used in Chinese traditional medicine, philosophy and feng shui. It is said that everything between heaven and earth are made of these five elements. They have vastly different properties yet are interdependent of each other. I am interested in the natural cycle to everything between Heaven and Earth, how wood gives rise to fire, fire gives rise to earth, earth gives rise to metal, metal gives rise to water and water gives rise to wood, completing the cycle. Chaos arises if we go against the natural flow of the universe and we thrive if we live in harmony with the laws of nature.

The built layers of the painting are embedded with different materials such as aluminum foil, pine needles and prints of leaves. The elements are separated by their respective boxes yet the intaglio, collage elements and paint connect them together in different ways to create unity.

Leave a Comment

Deadlines help me stay focused

At the beginning of this year, I had nothing much going on except working on my picture book illustrations. I kept applying for artist calls like I did after getting my fine art certificate. I chose projects that I was interested in and they gave me a time frame to work on something. Even if I didn’t get selected, I could always learn something from the process and add more artworks to my portfolio. That’s how I build up my experience and portfolio.

For smaller projects, I tend to wait until the last minute to begin. The benefit of waiting is that I am forced to put all my energy into it before the deadline. It’s like a laser focus and I would do the whole thing in one go. This could get stressful and sometimes it didn’t work out so well. Afterwards, I might regret not starting earlier. For example, this year, I applied to 2 juried exhibitions. For the first one, I worked on my painting over a two months period, I changed the colour scheme midway and it was selected to be in the exhibition. For the second exhibition, I worked on two paintings simultaneously and finished them in several days but none were selected.

For larger project, I know I have to divide and conquer. For example, I kept a record of how many days it takes me to work on one illustration and that’s my base number (it took me one week to finish the first illustration but I got faster once I figured out the style I was going to use). Then I would calculate how many days I have and divide this by the total number of illustrations (32 pages for a picture book) to figure out how many days I can spend on each illustration. I re-calculated the number throughout the project to make sure I was still on track because sometimes I finished faster and sometimes it took longer than expected. I found breaking down large project into smaller deadlines were helpful too. Like how the timeline for my picture book Emet’s Box were divided into smaller milestones:

  • DRAFT interior illustrations — due March 1st
  • FINAL interior illustrations — due June 1st
  • Cover illustration — due July 1st
  • All final illustrations — due August 1st

I watched a TED Talk The surprising habits of original thinkers by Adam Grant  that “moderate” procrastination has its benefit.  
Even though I haven’t started working on the project, my brain is already thinking about it and working on it. So now, I make sure I read what the project entails, let it marinate over time and finally sit down to do my laser focused work on it.

Leave a Comment