One year after signing the publishing contract, my picture book is finally done! I’ve submitted the final texts and illustrations. It’s in the hands of my publisher now. It has been a long process and a lot of work but very fulfilling. Check out my COVER REVEAL and interview on my publisher’s blog here.
I am writing a series of recaps for the making of my debut picture book Emet’s Box. This is the first recap.
Previously, I wrote a blog post about when I got my idea for the picture book Emet’s Box here: Inspiration that Woke Me Up. Looking back at my notes now, I realized that I had a general idea several months earlier while taking my first picture book class. It started out as something that I’ve realized from living life and something that I wanted to share with my son who was five at the time. Maybe it’s also a reminder to myself as a mom and as a person who’s still learning the secrets of life.
I wrote in my notebook/sketchbook/journal that:
“I know for sure that you are going to be something so big so awesome so wonderful when you grow up and that I can’t even imagine now. So I leave it to you. To shine + be yourself + always remember who you are inside. Because you are made of LOVE + LIGHT!”

(Wooo, I still get goose bumps reading this after five years…)
That’s the basis of my picture book Emet’s Box. That early morning when the Inspiration that Woke Me Up happened, the idea had already transformed into a picture book format with page numbers written on the pieces of scrap papers of my first draft.
This reminds me of a Ted Talk that I watched: The Surprising Habits of Original Thinkers by Adam Grant. He said there are benefits to procrastinating to a certain degree. Although we haven’t started on the task, our brains have already begun putting the pieces together while we procrastinate. Maybe that’s what happened to me here.
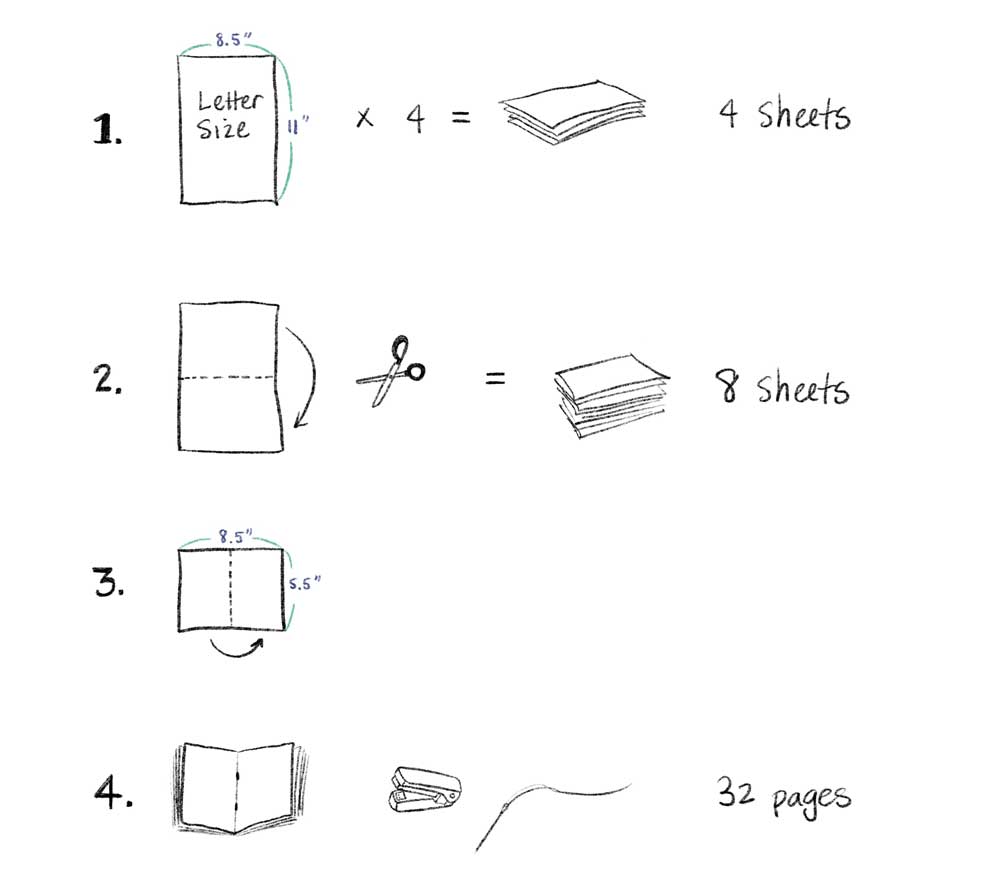
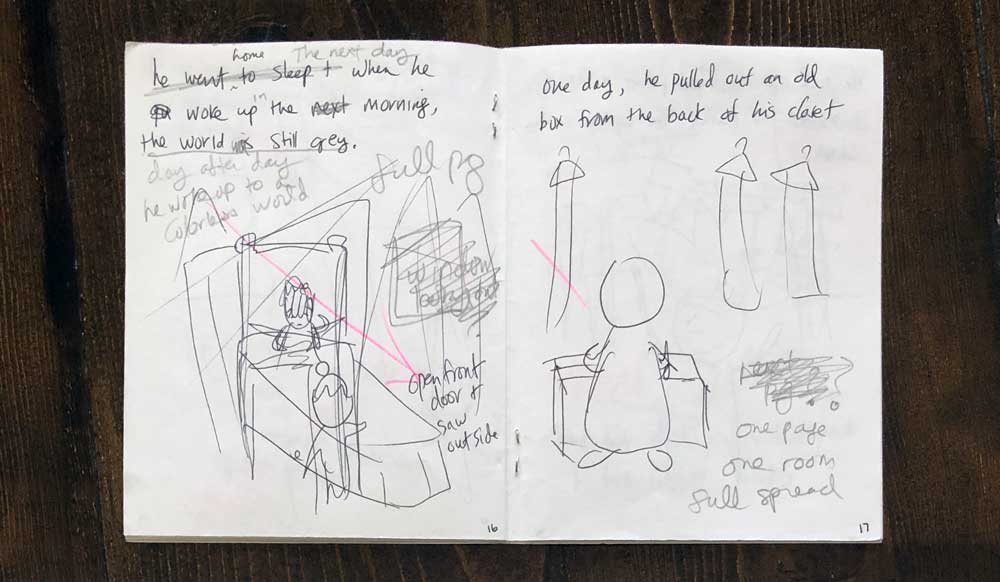
Soon after I wrote the first draft on papers, I made a little dummy book so I could see how the spread looked and how the page turns would affect the story (read more about dummy books here). I also put my story onto a thumbnail page that I got from my picture book class.

Later I made more dummy books and different thumbnail formats that suited the stage of my process. For example, I took pieces of 11” x 17” papers and drew my own thumbnail boxes. I drew and wrote down all my ideas on these papers. I found the large size of blank paper freeing and great for brainstorming.

In January 2019, I put my effort into making my picture book. My goal was to get it critiqued at the SCBWI conference in Seattle so I needed to have my dummy book done by then. This goal made me push myself to finish the task.
The manuscript went through multiple critics and I made several dummy books to show my local SCBWI people.
Just before the conference, I finished my dummy book but I also needed several full colour spread and images to show at the critique. I only have a few days left to do the colours. Anyway, my illustrations were picked apart at the critique. I felt sad but still made the changes and studied more picture books trying to improve my illustrations. I was a newbie at illustration and wasn’t sure what my style was yet. I was told the eyes of my characters were too big which was out of trend already. Looking back at my illustrations, the art director was totally right. I cringe when I look at my old illustrations and my son would scream in horror.
After the conference, I made changes and submitted the dummy to agents and publishers on the list from the conference. I have to confess that it took another while for my art to improve. I studied the illustrations of artists that I admire and sometimes I would copy the illustrations and realized how much layers of colors they put into it. It’s not just coloring one single block, it’s layers of colors, like in paintings.
I needed the time and practice to improve my skills for sure.
You can download the Picture Book Thumbnail Template that I made here. This is a general guideline and commonly seen one. There are many other formats and page counts out there. I read picture books and look for ones that I like and fit with my story.
Leave a Comment